Deploy private locations on a Raspberry Pi
Oct 17, 2025 | by Maximilian Kaske | [engineering]

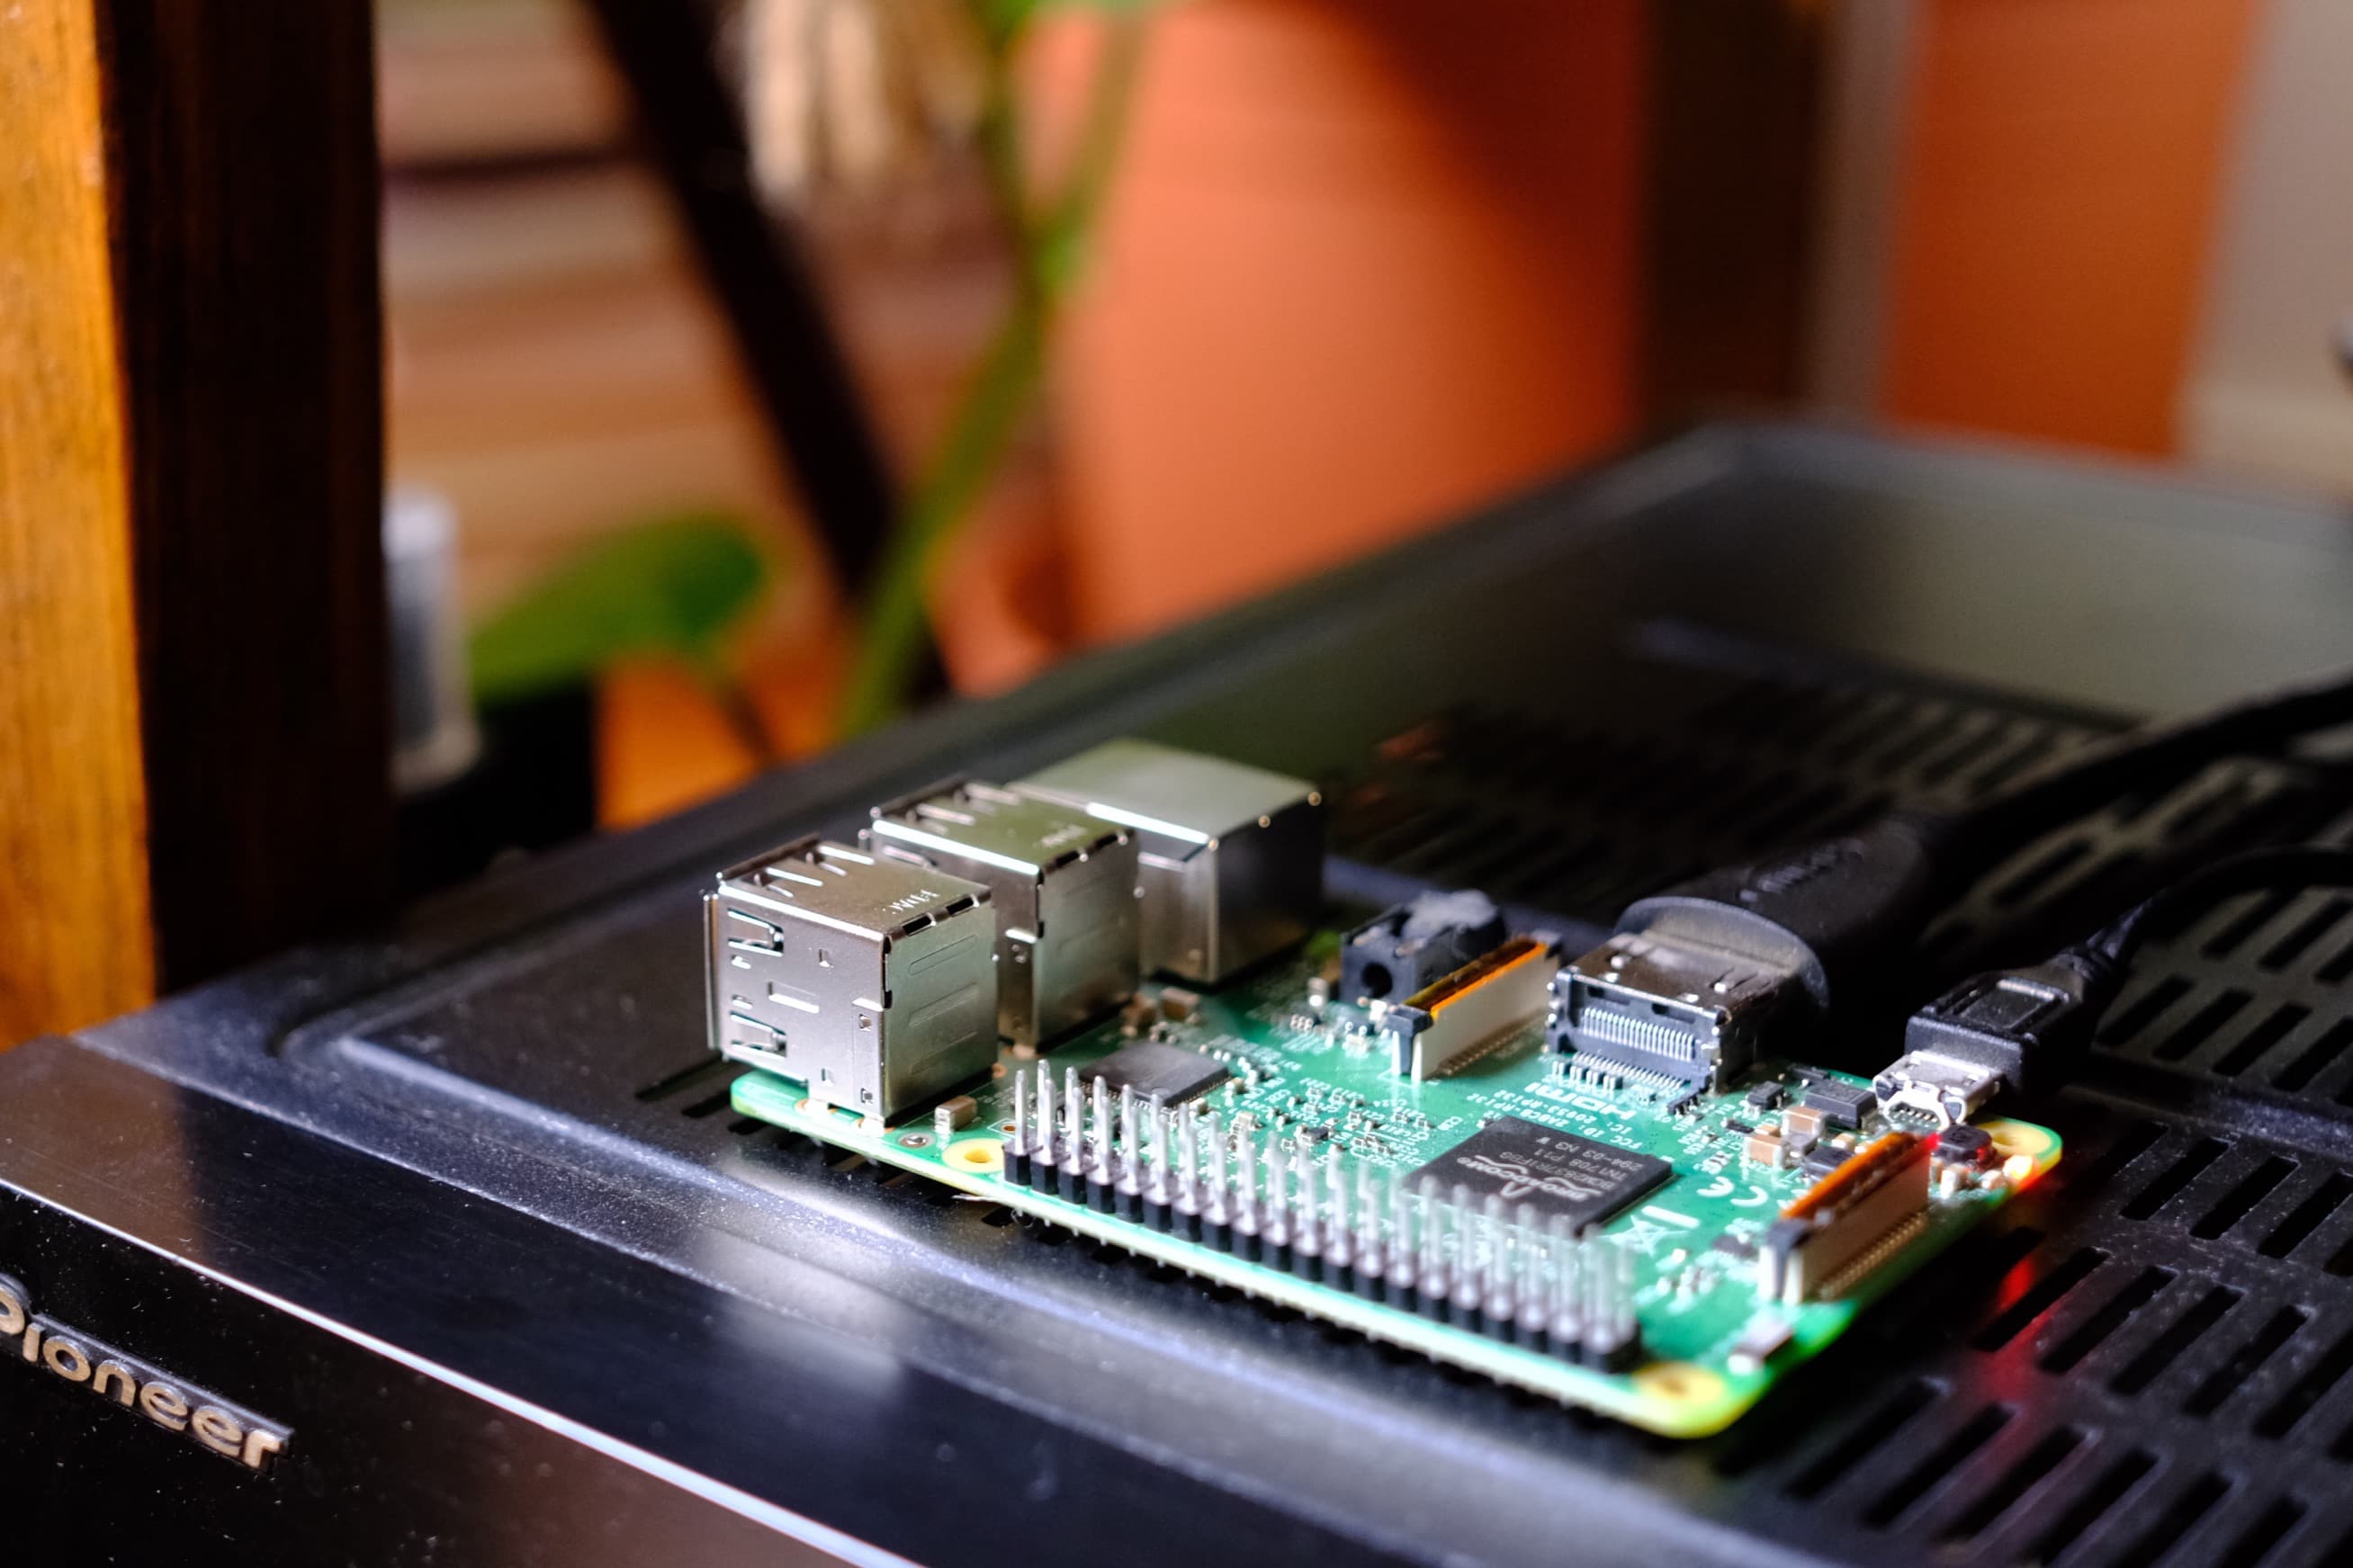
We just pushed the first version of Private Locations at openstatus - and I had to test it on my old Raspberry Pi 3.
Since 2016, I've been using the Pi for AirPlay to connect to my receiver but other than that, it's been sitting around without any other use case.
Time to revive it!
Deployment Guide
Obviously connecting to the Raspberry Pi via ssh - and if you're like me, the default password is secure enough:
$ ssh pi@raspberrypi.local
> password: raspberry
Hardware Specs
I didn’t know exactly which Debian version it was running, but it was very old - so I took the opportunity to clean everything up and upgrade to the latest available version.
Model:
$ cat /proc/device-tree/model
> Raspberry Pi 3 Model B Rev 1.2
Linux Kernel:
$ uname -a
> Linux raspberrypi 6.12.47+rpt-rpi-v8 #1 SMP PREEMPT Debian 1:6.12.47-1+rpt1 (2025-09-16) aarch64 GNU/Linux
Operating System:
$ cat /etc/os-release
> PRETTY_NAME="Debian GNU/Linux 13 (trixie)"
> NAME="Debian GNU/Linux"
> VERSION_ID="13"
> VERSION="13 (trixie)"
> VERSION_CODENAME=trixie
> DEBIAN_VERSION_FULL=13.1
> ID=debian
> HOME_URL="https://www.debian.org/"
> SUPPORT_URL="https://www.debian.org/support"
> BUG_REPORT_URL="https://bugs.debian.org/"
I'm running the OS on a 16GB micro SD card. The Pi has 1GB of RAM, which is perfectly enough for this use case.
Install Docker Image
Let's freshly install Docker using the official Debian repository instructions:
https://docs.docker.com/engine/install/debian/#install-using-the-repository
Once installed, Docker should already be running.
You can verify it with:
$ sudo systemctl status docker
Pull and Run the OpenStatus Container
Let's grab the image:
$ sudo docker pull ghcr.io/openstatushq/private-location:latest
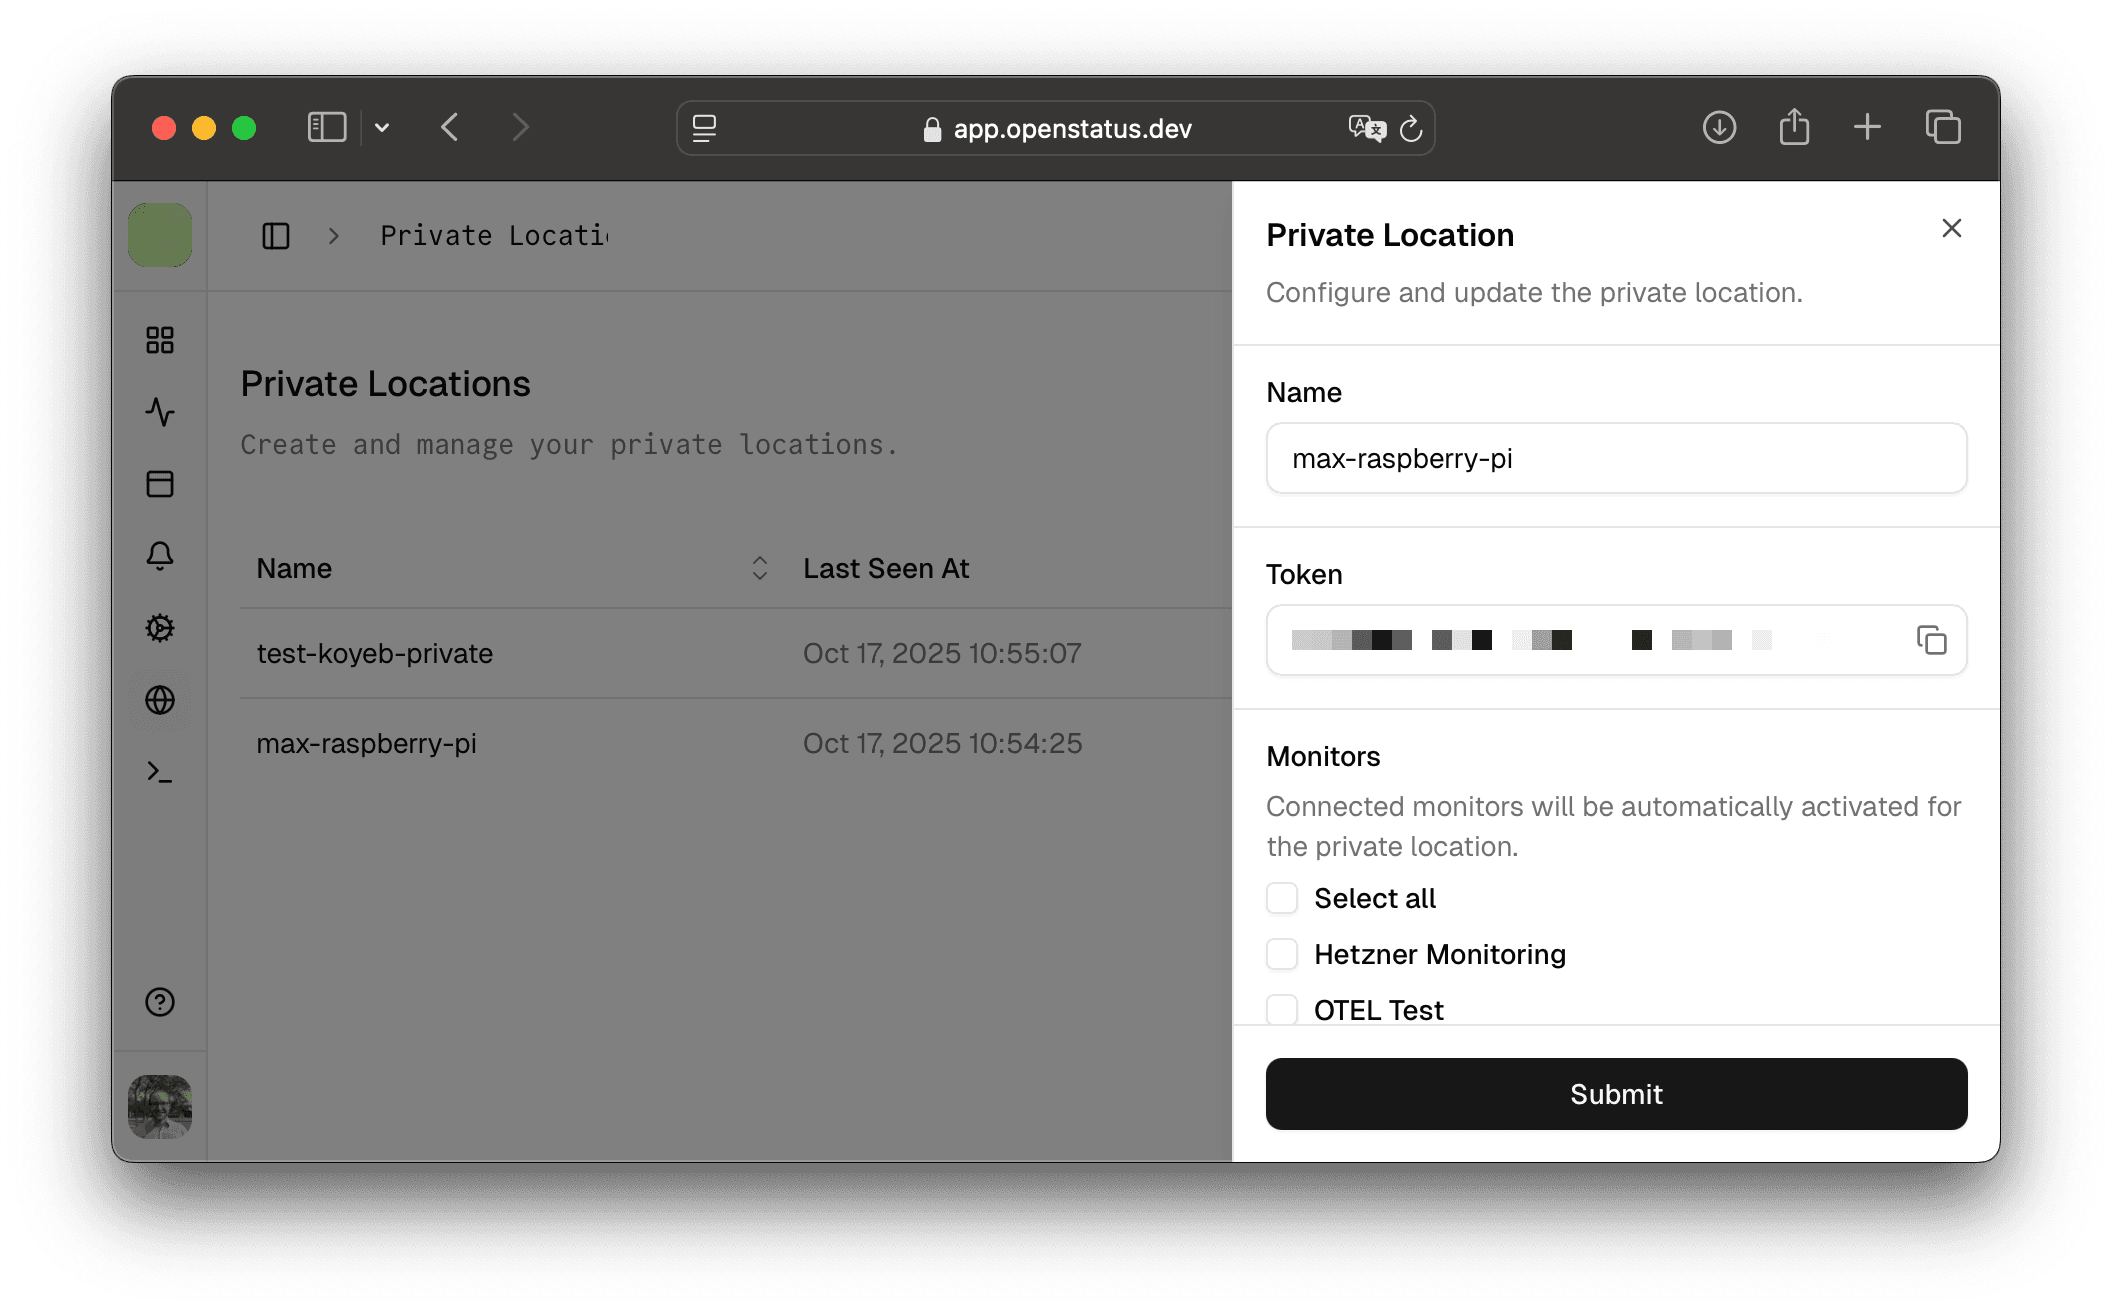
If you have access to Private Locations in the Dashboard, create one - it'll will provide you a token to use as an environment variables:
Add the token to your shell profile:
$ echo 'export OPENSTATUS_KEY=<token>’ >> ~/.bashrc
Reload the shell profile:
$ source ~/.bashrc
If you are using oh-my-zsh you might be using the ~/.zshrc file instead.
Check that it worked:
# print the env var
$ echo $OPENSTATUS_KEY
Run the Container
Now let's launch it:
$ sudo docker run -d \
  --name openstatus-private-location \
  --restart=always \
  -e OPENSTATUS_KEY=$OPENSTATUS_KEY \
  ghcr.io/openstatushq/private-location:latest
What these flags do:
-d: run in background (detached mode)--restart: auto-start on reboot--name: give it a nice readable name-e: pass your env var into the container
Don't sleep on
--restart=always! How often I had to quickly switch position of and need to reboot the Raspberry, this is a game changer.
To see live logs:
$ sudo docker logs -f openstatus-private-location
What Happens Next
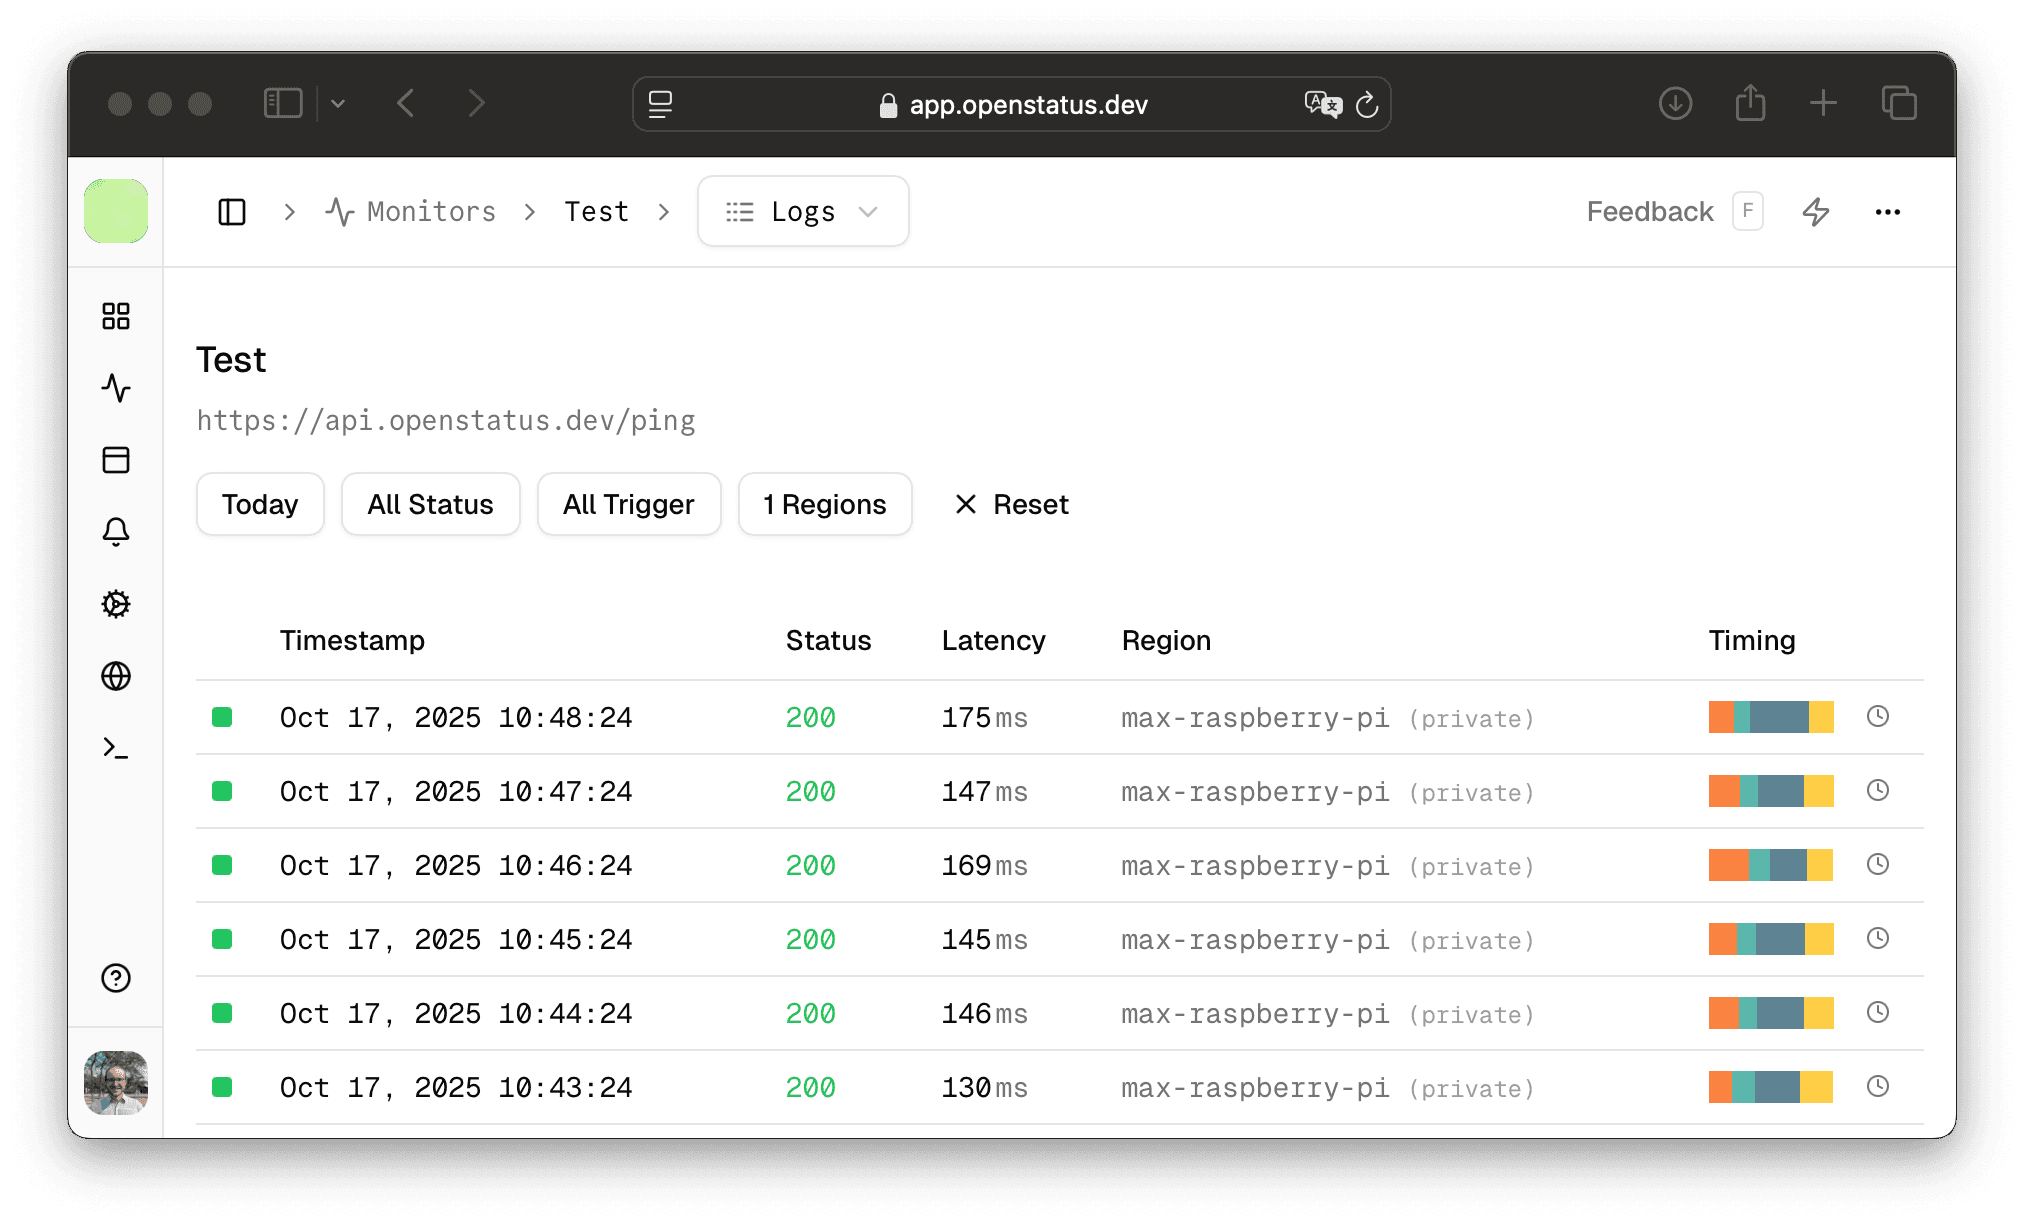
Once the container is up, openstatus automatically fetches the endpoints you've chosen for this private location and starts monitoring them.
Every few minutes (last_seen_at), the agent refreshes its internal database to stay up-to-date with any changes - like added monitors or updated headers.
The responses of the pings are sent to our ingest endpoint for storage and aggregation.
Light on Resources
Our Docker image is just 8.5 MB in size. Compare that to 1GB+ for some competitors (yes, they pack more features, but still 🤯).
It's wild that a tiny 1 GB-RAM device from 2016 can now handle this so easily.
Why Private Locations?
Running a private probe means your checks happen from within your own network - not just from public cloud servers.
It’s useful for:
- Monitoring internal applications or databases
- Testing network latency from real-world locations (like your office or home)
- Running low-cost monitoring nodes on tiny devices (e.g. in agriculture or industrial setups)
Closing Thoughts
And that’s it - my Raspberry Pi (2016) is officially back in action. Running quietly next to my receiver, it’s now part of the openstatus network, checking endpoints from my home.
Not bad for a 9-year-old piece of hardware.
If you'd like to try this out yourself, contact us (discord, email) and head over to:
pkgs/container/private-location
Private locations are currently in beta and we're gathering feedback from early users. If you've got an old Raspberry Pi lying around - this is your excuse to bring it back to life.
A few more useful Commands
# stop running
$ docker stop openstatus-private-location
# remove the container, not the image or data:
$ docker rm openstatus-private-location
# remove unused images (docker keeps old images even after pulling updates)
$ docker image prune -f
# check docker image statistics
$ docker stats
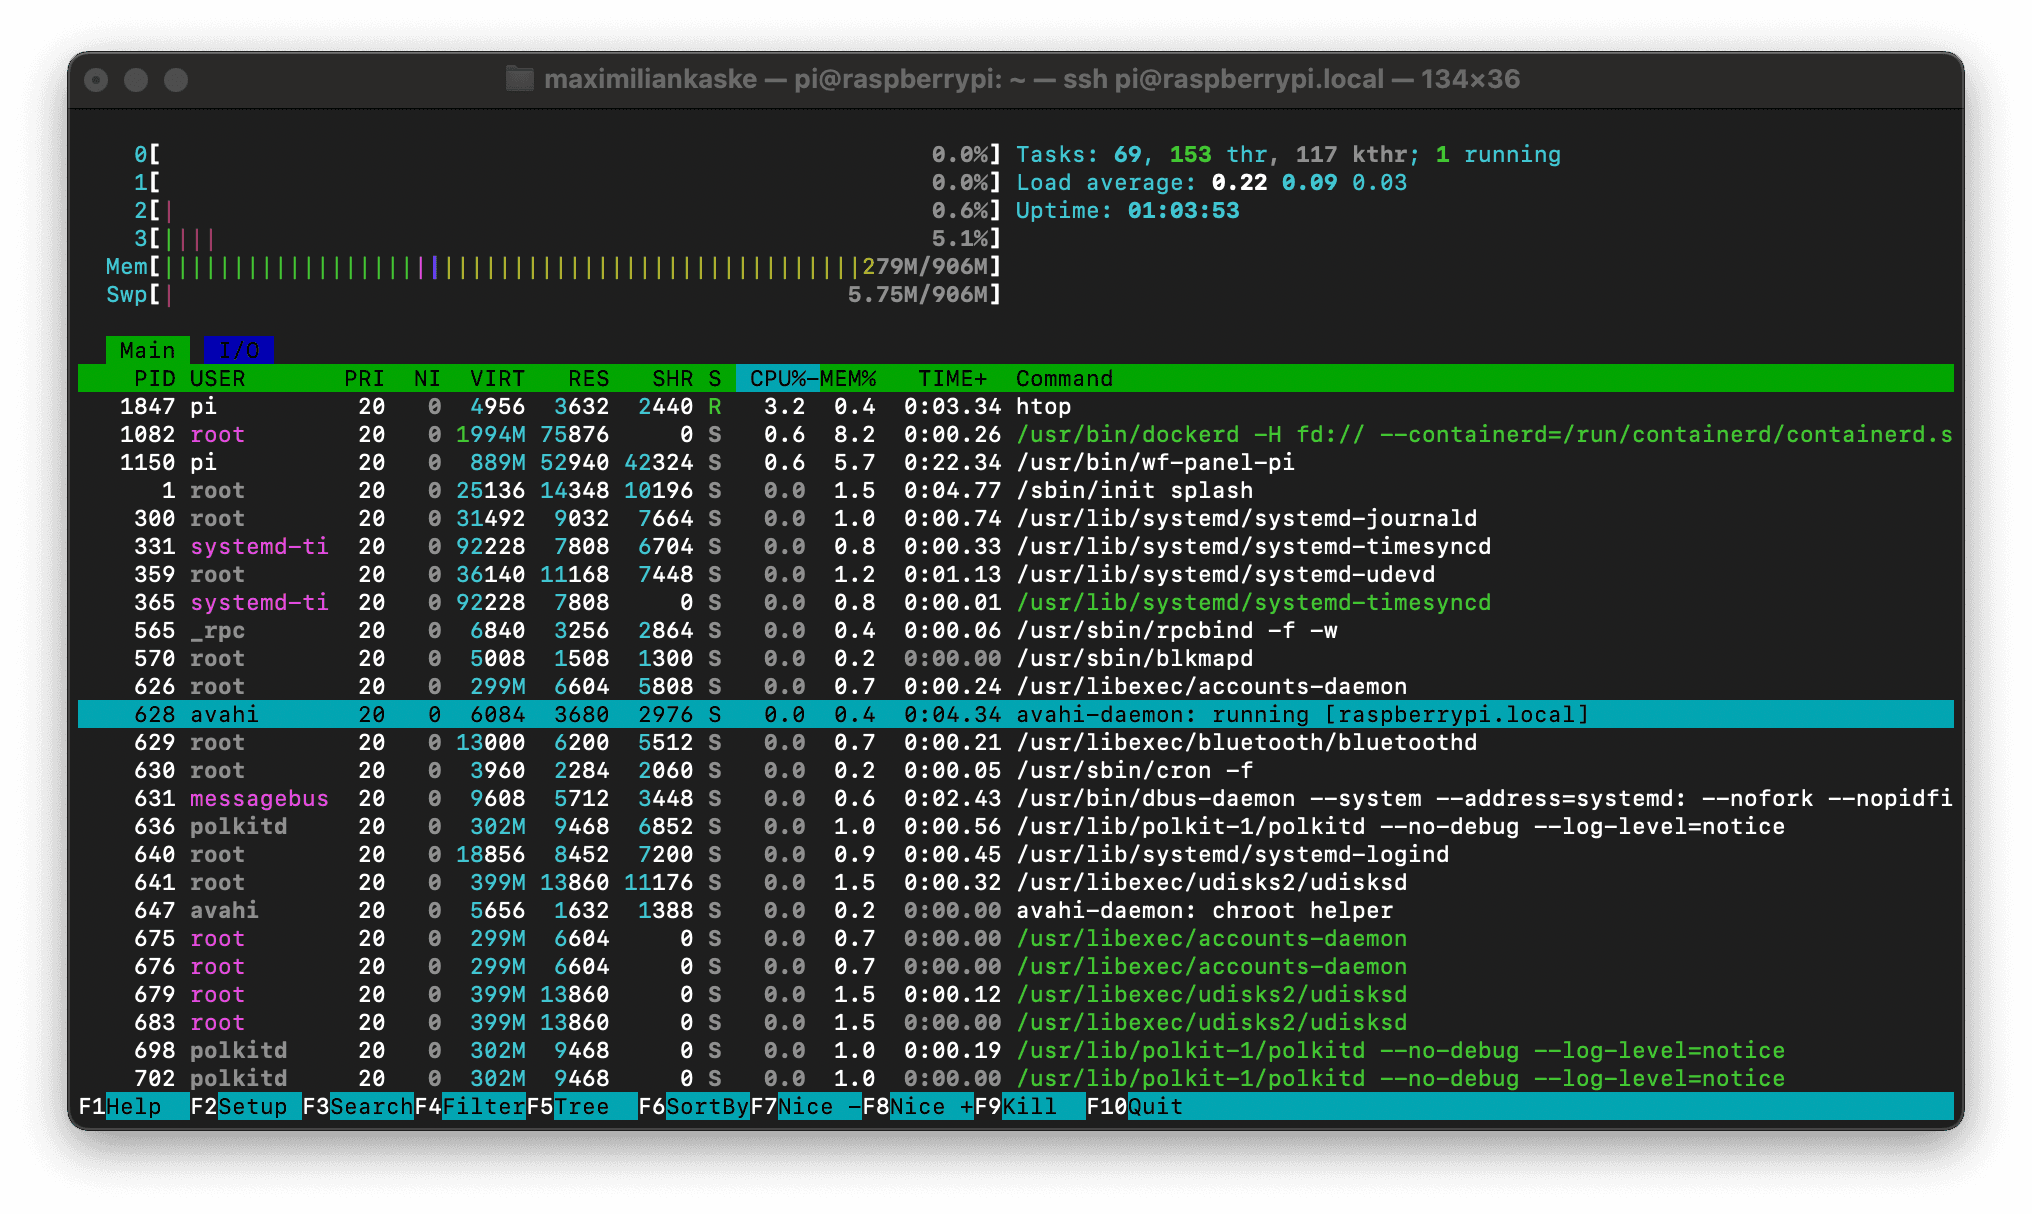
# check the CPU / RAM usage (each work)
$ htop
$ top
# update docker image
$ docker stop openstatus-private-location
$ docker rm openstatus-private-location
$ docker pull ghcr.io/openstatushq/private-location:latest
$ docker run ... # same command as before